Rubber Floor Install: Glue
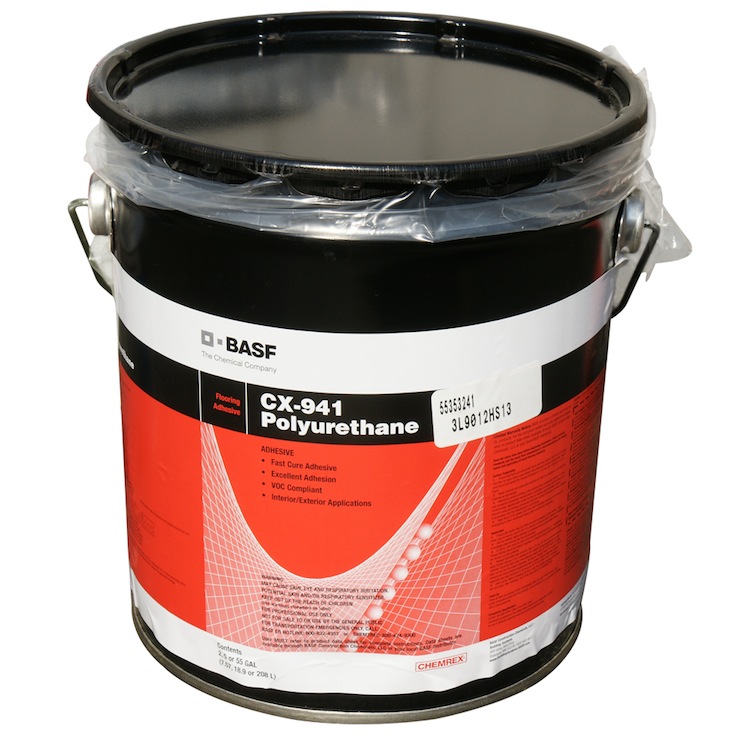
Glue adhesives are a sturdy, permanent method for installing your rubber flooring, and there’s a few things you’ll need to prepare for the process. First, you’ll need a polyurethane-based glue, such as Chemrex-CX941, and a V-notch trowel with which to spread it. It’s advisable to cover the unused portions of the trowel with duct tape, so that excess glue can be easily removed after the rubber floor install, before it cures and bonds to the trowel. Finally, you’ll need a 100 lb roller, as well. You’ll also want to be sure that you have a proper set of gloves to protect your hands while handling the glue.
Be sure to inspect the entire surface that you’ll be covering with flooring, checking to ensure that it’s flat and free of debris, cracks and crevices. Ideally, the floor shouldn’t have any variations in elevation that are great than 1/8”. Take note of wherever these elevations are. There’s one other, vital task as you prepare to install your rubber flooring with glue: be sure to lay your flooring for at least 24 hours, with the curled edges facing downward. This will allow your rubber flooring to flatten our and take their final form before they’re glued to the floor.
Once you’re fully prepared and the floor is inspected, you’re ready to begin the rubber floor install. If possible, try to wedge down part of your first roll, so that it’s secure without the glue in place. You way want to take a piece of chalk and draw the outlines of where each strip of flooring will lie, before using glue to adhere it to the ground. Trowel the glue onto the surface to be covered and immediately lay and press the flooring to the glue, firmly bonding the floor to the glue using the 100 lb. roller. Continue this process for all rolls, until the room is covered in rubber flooring. Chemrex glue has approximately 30 minutes before it forms a permanent bond. Therefore, do not lay down glue for an area larger than can be covered in a 30-minute period. During this half hour, it will be possible for you to wiggle and adjust the seams of your flooring, if there’s any error. Be sure to use the 100 lb. to flatten each roll of flooring 30 minutes after it was first laid down.
If you found any uneven, low-lying areas of your floor as you inspected it, be sure to weight these areas down to ensure a firm bond. Your floor’s glue should be allowed to cure for a minimum of 24-48 hours before the area is used in a normal capacity (though light foot traffic is acceptable within 12-24 hours).