Rubber Floor Install: Double-Sided Tape
One of the many benefits of rubber flooring is that you can easily install it without the need to pay a contractor to install it on your behalf. Using double-sided tape, anyone can create a seamless floor installation that is sure to remain in place due to the weight of rubber flooring. There are just a few tools to gather and you’ll be ready to start.

Since rubber flooring typically comes in the form of rolls and interlocking tiles, noting the edges is very important. Using a string, a piece of chalk, or even a pencil will allow you to accomplish this. It’s also useful to have a straightedge on hand. If your room requires that the rubber flooring is cut to fit a irregularly-shaped area, you should also have a utility knife at your disposal. Last, but certainly not least, you’ll need your double-sided tape. We’re not talking about the double-sided Scotch tape that comes in a yellow dispenser! An industrial-grade tape like Shurtape DS is ideal.
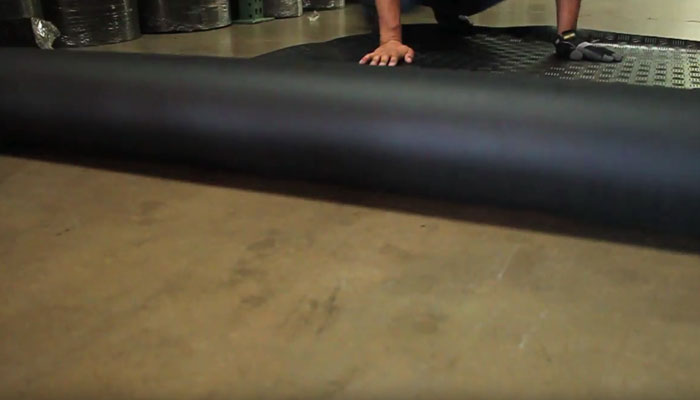
With your tools at hand, you’re ready to begin your rubber floor install project. Start by placing your first flooring roll flush against a wall in the room, starting in one corner and following the wall’s perimeter. If the roll is slightly longer than the room, note the excess amount and use your utility knife and straightedge to remove the excess portion. Then you’ll want to use whatever item you’ve chosen to mark the flooring seams (chalk, string, etc.) and draw a line along the other side of the flooring roll you’ve laid down. Once this is done, you’ll use this as a guide to take your next roll of flooring and lay it in place, repeating the process you’ve just completed, until you’ve determined where the flooring seams will be across your entire room.

At this point, it’s time to grab your double-sided tape. Your tape should have paper cover over the secondary adhesive layer, so begin by applying the side that’s already sticky to the seams of your floor—and be sure that you don’t forget to place tape along the walls! Once you’ve placed tape along the room’s perimeter and all of the seams, and the tape is firmly attached to the surface, it’s time to start laying your rubber flooring on top of it. If you wish, you can remove the top layer of paper of the tape that lines one wall, so that your first flooring roll stays in place. Now take your second roll of flooring and place it against the first, along the seam that you’ve drawn. Once they’re both in place, you can begin to remove the paper backing on the top of the double-sided tape, which will be pulled through the seam of the two flooring rolls. Be sure to press down firmly along the seam to maximize the bond of the adhesive. Repeat this process for each flooring roll! It is possible, if desired, to use an entire strip of tape for each side of flooring that abuts each other along the seam, but the process of removing the paper that lines the top of the double-sided tape is a bit more difficult this way. We recommend a second person to help you with the rubber floor install if you decide to go this route.